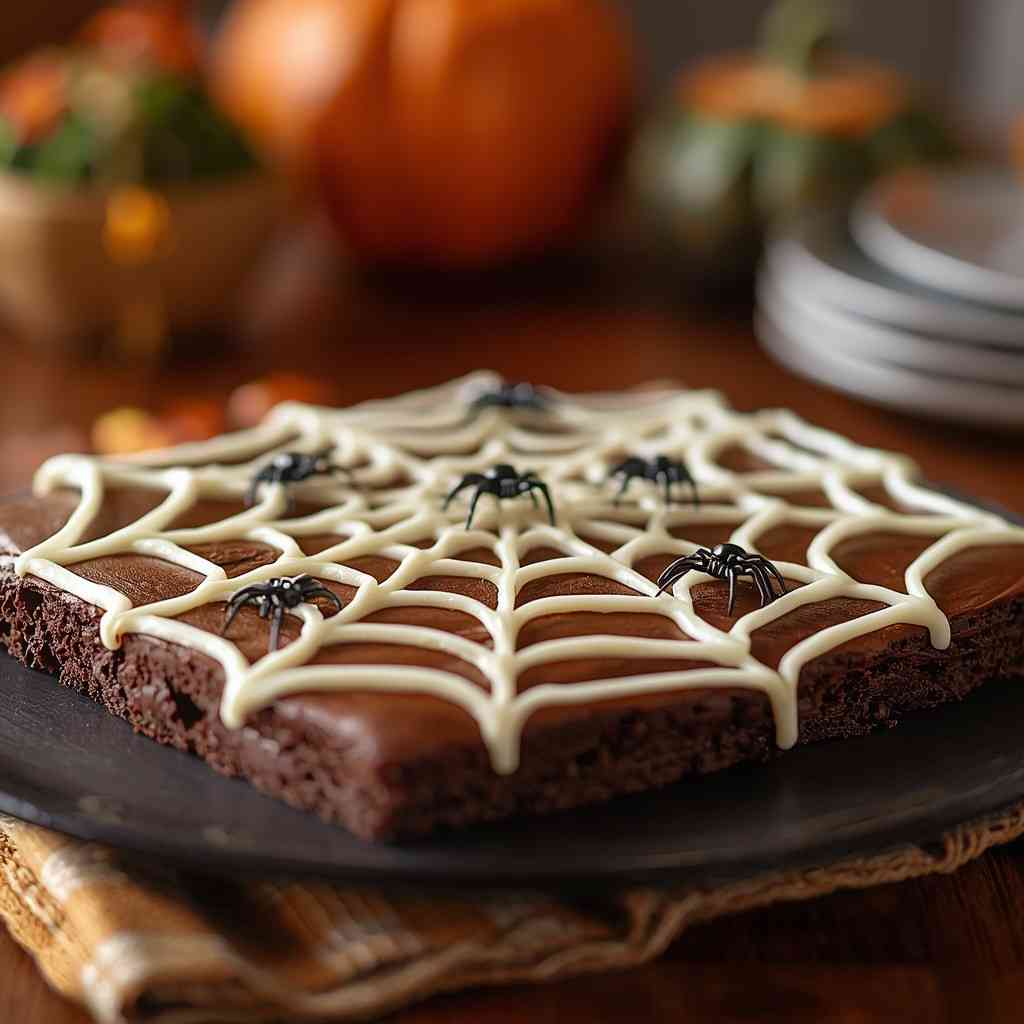
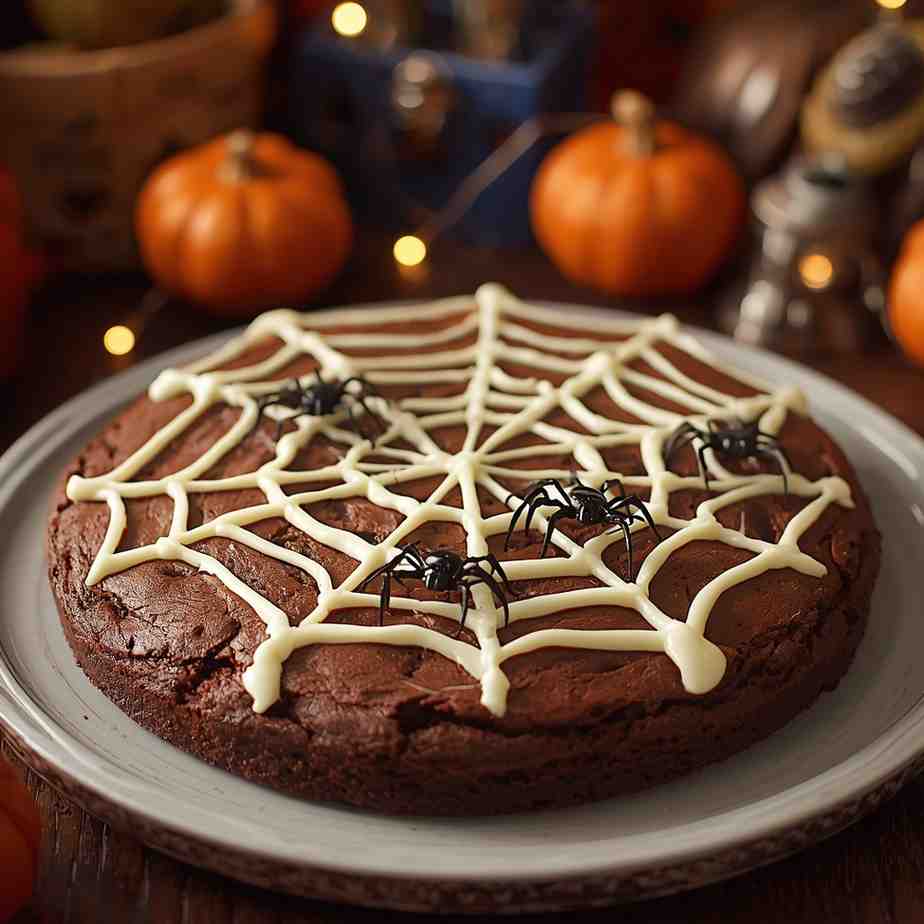
When Halloween season rolls around, nothing hits the sweet spot quite like Spooky Spider Web Chocolate Brownies! These fudgy, decadent brownies are topped with a silky layer of white chocolate or icing that’s transformed into creepy-cool spider webs — a treat that’s as fun to make as it is to eat. Whether you’re hosting a Halloween party, preparing themed desserts for a kids’ event, or simply indulging in your love for chocolate, this recipe is guaranteed to impress.
The combination of rich, dark cocoa flavor and creamy web-like decoration creates an irresistible dessert that’s both eye-catching and delicious. Every bite melts in your mouth with that classic brownie chewiness, balanced by the sweetness of the spider web glaze.
Why I Love This Recipe
I love this recipe because it’s a perfect blend of creativity and comfort. It allows you to turn a simple brownie into a piece of edible art — something both spooky and stunning. The recipe doesn’t just deliver great taste; it’s also a fun activity that brings out the artist in you. The spider web design is easy to make yet looks professional, and the brownies themselves are everything a chocolate lover dreams of — gooey, moist, and intensely chocolaty.
The aroma that fills your kitchen while these bake is pure bliss — warm chocolate and butter mingling in the air — and when you finally drizzle on the spider web icing, it feels like the finishing touch to a magical, hauntingly beautiful dessert.
Why It’s a Must-Try Dish
This is a must-try recipe for anyone who loves:
- Chocolate desserts that are soft, fudgy, and perfectly rich.
- Halloween-themed treats that wow guests with their look.
- Easy bakes that don’t require fancy skills but still look impressive.
- A chance to get creative in the kitchen with simple decorations.
It’s also highly versatile — you can use your favorite brownie base (from scratch or even a boxed mix) and customize the topping to your liking. Plus, it’s a total crowd-pleaser for both kids and adults!
Preparation & Cooking Details
- Preparation Time: 20 minutes
- Cooking Time: 30–35 minutes
- Cooling & Decorating Time: 20 minutes
- Total Time: ~1 hour 15 minutes
- Servings: 12 brownies
- Calories: Approximately 270 calories per serving
Course and Cuisine
- Course: Dessert
- Cuisine: American / Halloween Special
Ingredients
For the Brownies:
- 1 cup (230 g) unsalted butter
- 8 oz (225 g) semi-sweet or dark chocolate, chopped
- 1 cup (200 g) granulated sugar
- ½ cup (100 g) brown sugar, packed
- 3 large eggs
- 1 tsp vanilla extract
- ¾ cup (95 g) all-purpose flour
- ¼ cup (30 g) unsweetened cocoa powder
- ½ tsp salt
For the Spider Web Topping:
- ½ cup (90 g) white chocolate chips or white candy melts
- 1–2 tbsp heavy cream or milk (for thinning, optional)
- 2 tbsp melted dark chocolate (for spider designs, optional)
Cooking Directions
Step-by-Step Preparation Method
Step 1: Prepare the Pan
- Preheat your oven to 350°F (175°C).
- Line an 8×8-inch (20×20 cm) square baking pan with parchment paper, leaving a bit of overhang for easy lifting later.
- Lightly grease the paper with butter or spray.
Step 2: Melt Butter and Chocolate
- In a medium saucepan over low heat, melt the butter and chopped chocolate together until smooth and glossy.
- Remove from heat and let it cool for 5 minutes.
Step 3: Mix Wet Ingredients
- Whisk in both granulated and brown sugar until well combined.
- Add the eggs, one at a time, whisking after each addition.
- Stir in vanilla extract.
Step 4: Add Dry Ingredients
- Sift together flour, cocoa powder, and salt.
- Gently fold the dry ingredients into the chocolate mixture until just combined.
- Do not overmix — the batter should be thick and shiny.
Step 5: Bake
- Pour the batter into the prepared pan and spread evenly.
- Bake for 30–35 minutes, or until a toothpick inserted in the center comes out with a few moist crumbs.
- Let the brownies cool completely in the pan.
Step 6: Make the Spider Web Glaze
- Melt the white chocolate chips in a microwave-safe bowl in 20-second bursts, stirring between each until smooth.
- If too thick, stir in a spoonful of cream or milk to loosen it slightly.
- Spread the melted white chocolate evenly over the cooled brownies.
Step 7: Create the Spider Web
- Melt a small amount of dark chocolate (or use black decorating gel).
- Using a piping bag or a zip-top bag with the corner snipped, draw concentric circles on the white chocolate layer.
- Use a toothpick to drag lines from the center outward — forming a web pattern.
Step 8: Add Optional Spiders
- Draw small spider bodies using drops of dark chocolate or place small candy spiders on top for extra fun!
How to Serve
- Cut into squares once the topping has set.
- Serve at room temperature for the best texture.
- Pair with a glass of cold milk, vanilla ice cream, or a hot mocha for the ultimate indulgence.
- Perfect for Halloween dessert tables, party platters, or spooky movie nights!
Recipe Tips
- Don’t overbake: Slightly underbaked brownies stay fudgy; overbaked ones turn cakey.
- Cool before decorating: If you add the white chocolate on warm brownies, it will melt unevenly.
- Use good chocolate: The richer the chocolate, the deeper the flavor.
- Smooth webs: If your chocolate is too thick to pipe, add a drop of vegetable oil to thin it.
- Clean cuts: For neat slices, use a hot knife and wipe between cuts.
Variations
- Pumpkin Spice Web Brownies: Add ½ tsp pumpkin spice to the batter and drizzle with orange-tinted white chocolate for a festive twist.
- Peanut Butter Spider Webs: Use melted peanut butter for the web design — deliciously nutty!
- Red Velvet Spider Webs: Use a red velvet brownie base and decorate with white chocolate for a bloody, eerie effect.
- Mint Chocolate Webs: Stir ½ tsp peppermint extract into the batter and use green-tinted icing for the web.
- Gluten-Free Version: Substitute flour with a 1:1 gluten-free baking blend.
Freezing and Storage
- Storage:
Store in an airtight container at room temperature for up to 3 days or in the refrigerator for up to 5 days. - Freezing:
Wrap each brownie piece tightly in plastic wrap and place in a freezer bag.
They freeze beautifully for up to 2 months.
Thaw overnight in the refrigerator or at room temperature before serving.
Special Equipment Needed
- 8×8-inch baking pan
- Parchment paper
- Mixing bowls
- Whisk and spatula
- Saucepan (for melting chocolate)
- Piping bag or zip-lock bag (for web design)
- Toothpick (for spider web effect)
Conclusion
Spooky Spider Web Chocolate Brownies are everything you want in a Halloween dessert — fun, spooky, rich, and devilishly delicious. They strike the perfect balance between festive creativity and indulgent chocolate comfort. Whether you’re baking for a costume party or just craving something seasonally sweet, these brownies will make your spooky celebration unforgettable.
Spooky Spider Web Chocolate Brownies
When Halloween season rolls around, nothing hits the sweet spot quite like Spooky Spider Web Chocolate Brownies! These fudgy, decadent brownies are topped with a silky layer of white chocolate or icing that’s transformed into creepy-cool spider webs — a treat that’s as fun to make as it is to eat.
Ingredients
For the Brownies:
For the Spider Web Topping:
Instructions
-
Step 1: Prepare the Pan : Preheat your oven to 350°F (175°C). Line an 8x8-inch (20x20 cm) square baking pan with parchment paper, leaving a bit of overhang for easy lifting later. Lightly grease the paper with butter or spray.
-
Step 2: Melt Butter and Chocolate : In a medium saucepan over low heat, melt the butter and chopped chocolate together until smooth and glossy. Remove from heat and let it cool for 5 minutes.
-
Step 3: Mix Wet Ingredients : Whisk in both granulated and brown sugar until well combined. Add the eggs, one at a time, whisking after each addition. Stir in vanilla extract.
-
Step 4: Add Dry Ingredients : Sift together flour, cocoa powder, and salt. Gently fold the dry ingredients into the chocolate mixture until just combined. Do not overmix — the batter should be thick and shiny.
-
Step 5: Bake : Pour the batter into the prepared pan and spread evenly. Bake for 30–35 minutes, or until a toothpick inserted in the center comes out with a few moist crumbs. Let the brownies cool completely in the pan.
-
Step 6: Make the Spider Web Glaze : Melt the white chocolate chips in a microwave-safe bowl in 20-second bursts, stirring between each until smooth. If too thick, stir in a spoonful of cream or milk to loosen it slightly. Spread the melted white chocolate evenly over the cooled brownies.
-
Step 7: Create the Spider Web : Melt a small amount of dark chocolate (or use black decorating gel). Using a piping bag or a zip-top bag with the corner snipped, draw concentric circles on the white chocolate layer. Use a toothpick to drag lines from the center outward — forming a web pattern.
-
Step 8: Add Optional Spiders : Draw small spider bodies using drops of dark chocolate or place small candy spiders on top for extra fun!