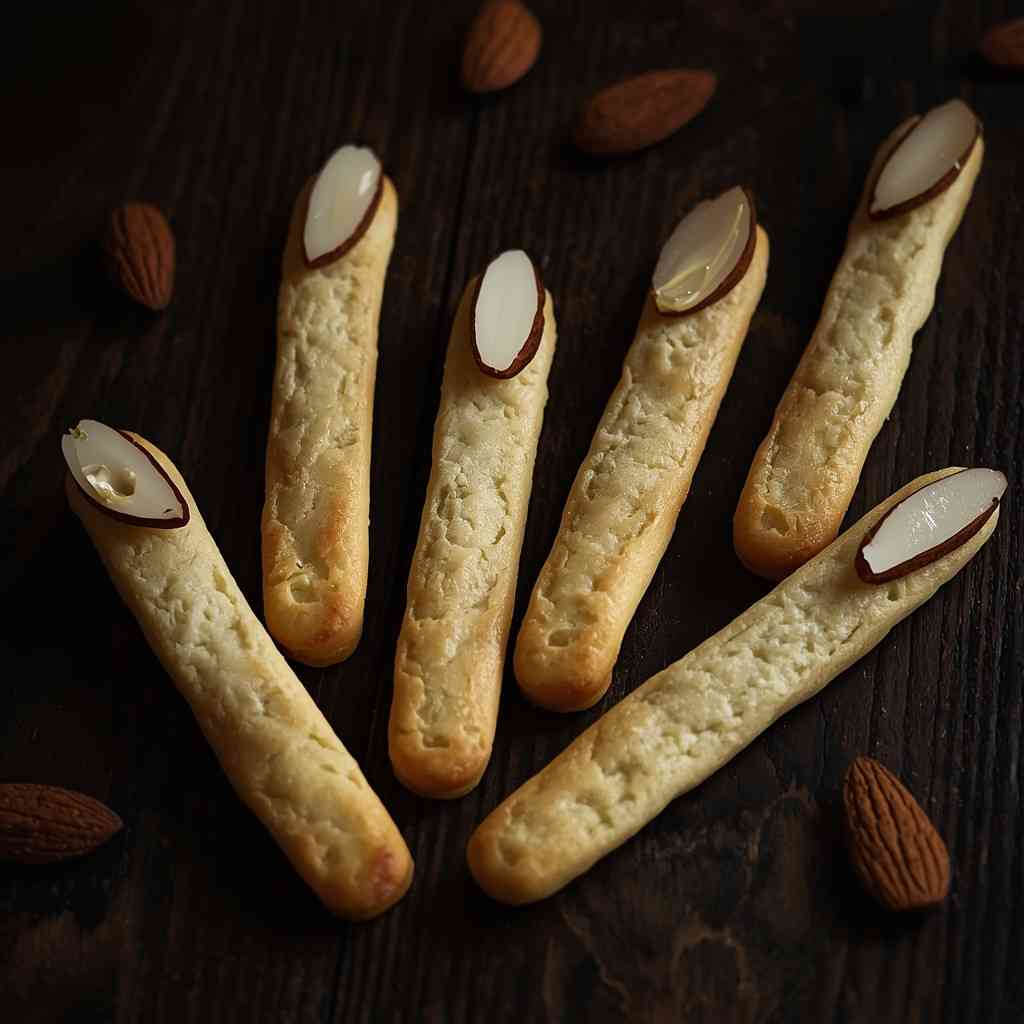
If Halloween had a signature cookie, Creepy Witch Finger Cookies with Almond Nails would be it! These delightfully spooky treats are buttery shortbread cookies shaped like gnarled witch fingers, complete with almond “nails” and knuckle creases for an eerily realistic look. A touch of red food coloring or strawberry jam adds that chillingly creepy effect — perfect for Halloween parties, trick-or-treat tables, or themed dessert platters.
These cookies may look scary, but they taste divine — crumbly, buttery, and perfectly sweet. Each “finger” melts in your mouth, delivering that comforting shortbread texture with a playful crunch from the almond “nail.” Whether you serve them to guests or make them as a fun family baking activity, these cookies always cast a delicious spell!
Why I Love This Recipe
I adore this recipe because it’s the perfect combination of creativity and comfort. There’s something wonderfully nostalgic about shaping the dough into spooky little fingers, adding almond nails, and watching them bake into gory perfection. The dough is incredibly easy to work with — soft, buttery, and forgiving — and the finished cookies are as tasty as they are terrifying.
It’s also a fantastic holiday bonding activity — kids love shaping the witch fingers, while adults appreciate the buttery, vanilla-rich flavor. Every bite reminds you that Halloween can be both spooky and delicious!
Why It’s a Must-Try Dish
Visually Stunning: Creepy, realistic, and perfectly themed for Halloween.
Simple Ingredients: Made from pantry staples like butter, flour, and sugar.
Rich and Buttery: A melt-in-the-mouth shortbread texture everyone loves.
Fun to Make: Great activity for kids and adults alike.
Customizable: You can tint, flavor, or decorate them in endless ways!
If you’re looking for a Halloween treat that’s as fun to make as it is to eat, this is the one.
Recipe Details
Preparation Time: 25 minutes
Chilling Time: 30 minutes
Cooking Time: 18–20 minutes
Total Time: ~1 hour 15 minutes
Servings: 24 witch finger cookies
Calories: ~130 kcal per cookie
Course: Dessert / Halloween Treat
Cuisine: American
Ingredients
For the Cookies:
1 cup (230 g) unsalted butter, softened
1 cup (120 g) powdered sugar
1 large egg
1 teaspoon pure vanilla extract
½ teaspoon almond extract (optional, for nutty aroma)
2¾ cups (350 g) all-purpose flour
1 teaspoon baking powder
¼ teaspoon salt
Green food coloring (optional, for a witchy hue)
For Decoration:
24 whole blanched almonds (for nails)
Red food coloring or strawberry jam (for “blood”)
Cooking Directions
Step-by-Step Preparation Method
Step 1: Prepare the Dough
In a large mixing bowl, cream together the softened butter and powdered sugar until light and fluffy.
Add the egg, vanilla extract, and almond extract, and mix until combined.
In a separate bowl, whisk together flour, baking powder, and salt.
Gradually add the dry ingredients to the wet mixture until a soft dough forms.
(Optional: Add a few drops of green food coloring for a spooky witch-finger color!)
Step 2: Chill the Dough
Wrap the dough in plastic wrap and refrigerate for at least 30 minutes.
This helps the dough firm up, making it easier to shape the fingers later.
Step 3: Preheat the Oven
Preheat your oven to 350°F (175°C).
Line two baking sheets with parchment paper.
Step 4: Shape the Witch Fingers
Scoop about 1 tablespoon of dough and roll it into a thin log about 3–4 inches long (like a finger).
Use your fingers or a small knife to pinch and shape “knuckles” about one-third and two-thirds down the length.
Press gently with a knife to make small wrinkle lines for added realism.
Step 5: Add the Almond Nails
Press a whole blanched almond firmly at one end of each finger to form the “nail.”
If desired, tint the almond lightly with red food coloring for a bloody effect.
Step 6: Bake the Cookies
Arrange the shaped fingers on the prepared baking sheets.
Bake for 18–20 minutes, or until lightly golden around the edges.
Let cool for 5 minutes on the tray, then transfer to a wire rack.
Step 7: Add the Bloody Finishing Touches
Once cooled slightly, remove the almonds gently, add a small drop of red food coloring or strawberry jam, and press the almond back into place.
You can also dab some jam at the base of each finger for extra spookiness!
How to Serve
Serve these Creepy Witch Finger Cookies on a black or orange platter lined with parchment paper. For an extra Halloween touch, sprinkle crushed chocolate cookies (as “dirt”) or serve alongside a bowl of “bloody” raspberry jam for dipping.
Perfect for:
Halloween dessert tables
Classroom parties
Trick-or-treat gatherings
Spooky movie nights
Recipe Tips
Keep it cool: Cold dough holds its shape better, so don’t skip chilling.
Shape carefully: Make the fingers thinner than you want them to be — they expand slightly during baking.
Realistic look: Add small lines or wrinkles with a butter knife or toothpick.
Avoid overbaking: You want them pale with light golden edges for a lifelike appearance.
Creative color: Add green or gray food coloring for a truly creepy witch vibe.
Recipe Variations
Chocolate Witch Fingers: Add 2 tablespoons of cocoa powder for dark “evil witch” fingers.
Bloody Vampire Fingers: Tint the dough red and use slivered almonds for extra scary detail.
Nut-Free Version: Replace almonds with pumpkin seeds or white chocolate “nails.”
Spiced Halloween Fingers: Add a pinch of cinnamon and nutmeg for fall flavor.
Gluten-Free Option: Use a 1:1 gluten-free flour blend — the texture remains buttery and soft.
Freezing and Storage
Refrigeration: Store baked cookies in an airtight container at room temperature for up to 5 days.
Freezing (Unbaked): Shape the fingers, place them on a tray, and freeze. Once solid, transfer to freezer bags and store for up to 2 months. Bake directly from frozen (add 2 extra minutes).
Freezing (Baked): Baked cookies can be frozen for up to 1 month. Thaw at room temperature and refresh in a 300°F oven for 5 minutes.
Special Equipment Needed
Mixing bowls
Hand or stand mixer
Parchment-lined baking sheets
Knife or toothpick (for wrinkles)
Cooling rack
Plastic wrap (for chilling dough)
Conclusion
Creepy Witch Finger Cookies with Almond Nails are the ultimate Halloween treat — equal parts eerie and delicious! Their buttery shortbread base, paired with clever decoration, makes them an unforgettable addition to any spooky celebration.
They’re easy to make, fun to shape, and perfect for both kids and adults. With every bite, you’ll taste the perfect blend of buttery sweetness and Halloween mischief.
If Halloween had a signature cookie, Creepy Witch Finger Cookies with Almond Nails would be it! These delightfully spooky treats are buttery shortbread cookies shaped like gnarled witch fingers, complete with almond “nails” and knuckle creases for an eerily realistic look.
Ingredients
For the Cookies:
1cup(230 g)
1cup(120 g)
1large egg
1teaspoon pure vanilla extract
½ teaspoon almond extract (optional, for nutty aroma)
2cups ¾ (350 g)
1teaspoon baking powder
¼ teaspoon salt
Green food coloring (optional, for a witchy hue)
For Decoration:
24whole blanched almonds (for nails)
Red food coloring or strawberry jam (for “blood”)
Instructions
1
Step 1: Prepare the Dough : In a large mixing bowl, cream together the softened butter and powdered sugar until light and fluffy. Add the egg, vanilla extract, and almond extract, and mix until combined. In a separate bowl, whisk together flour, baking powder, and salt. Gradually add the dry ingredients to the wet mixture until a soft dough forms. (Optional: Add a few drops of green food coloring for a spooky witch-finger color!)
2
Step 2: Chill the Dough : Wrap the dough in plastic wrap and refrigerate for at least 30 minutes. This helps the dough firm up, making it easier to shape the fingers later.
3
Step 3: Preheat the Oven : Preheat your oven to 350°F (175°C). Line two baking sheets with parchment paper.
4
Step 4: Shape the Witch Fingers : Scoop about 1 tablespoon of dough and roll it into a thin log about 3–4 inches long (like a finger). Use your fingers or a small knife to pinch and shape “knuckles” about one-third and two-thirds down the length. Press gently with a knife to make small wrinkle lines for added realism.
5
Step 5: Add the Almond Nails : Press a whole blanched almond firmly at one end of each finger to form the “nail.” If desired, tint the almond lightly with red food coloring for a bloody effect.
6
Step 6: Bake the Cookies : Arrange the shaped fingers on the prepared baking sheets. Bake for 18–20 minutes, or until lightly golden around the edges. Let cool for 5 minutes on the tray, then transfer to a wire rack.
7
Step 7: Add the Bloody Finishing Touches : Once cooled slightly, remove the almonds gently, add a small drop of red food coloring or strawberry jam, and press the almond back into place. You can also dab some jam at the base of each finger for extra spookiness!
Keywords:
Creepy Witch Finger Cookies with Almond Nails
Pin this recipe to share with your friends and followers.
Stella Parker
Blogger & Recipe Creator
Hi & Welcome to Stella’s Kitchen, where homemade recipes come to life with love and flavor. From easy weeknight dinners to classic comfort food and delicious desserts, My recipes are simple, flavorful, and family-friendly.