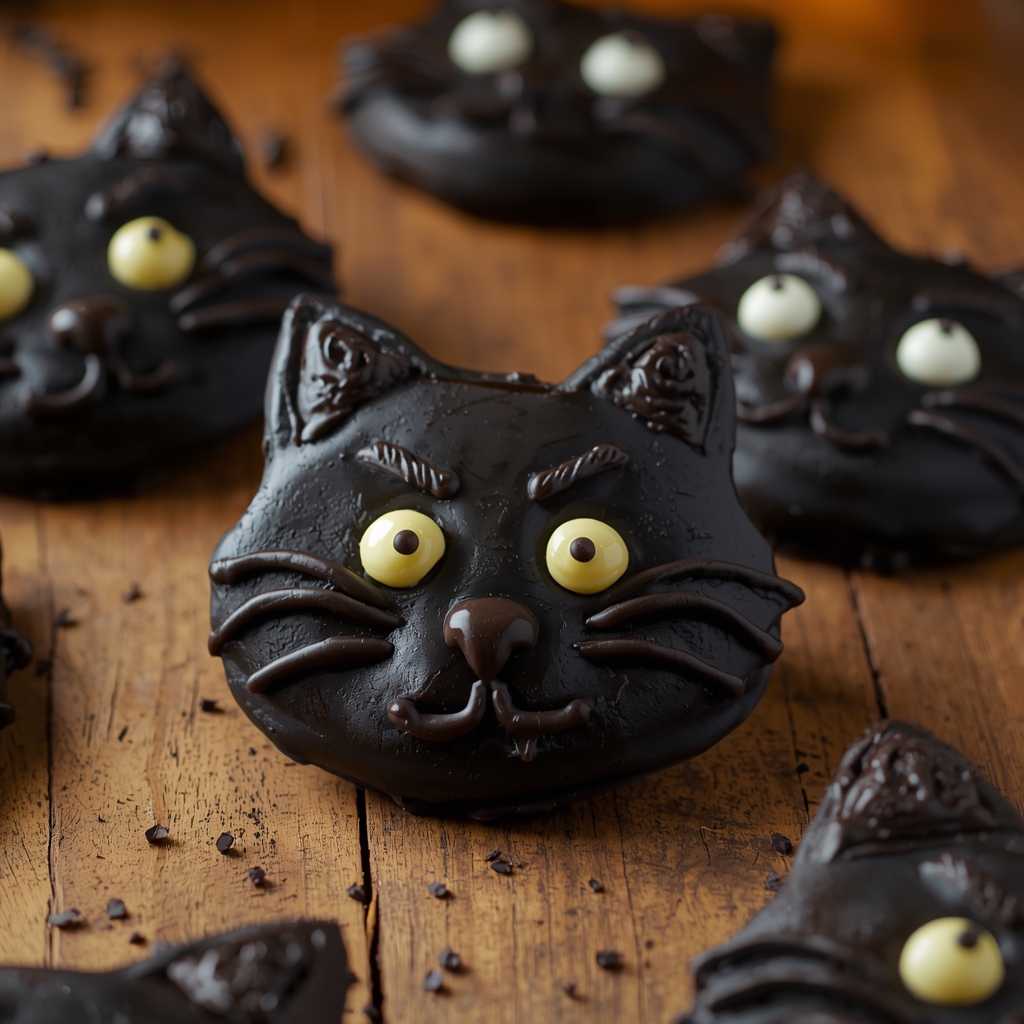
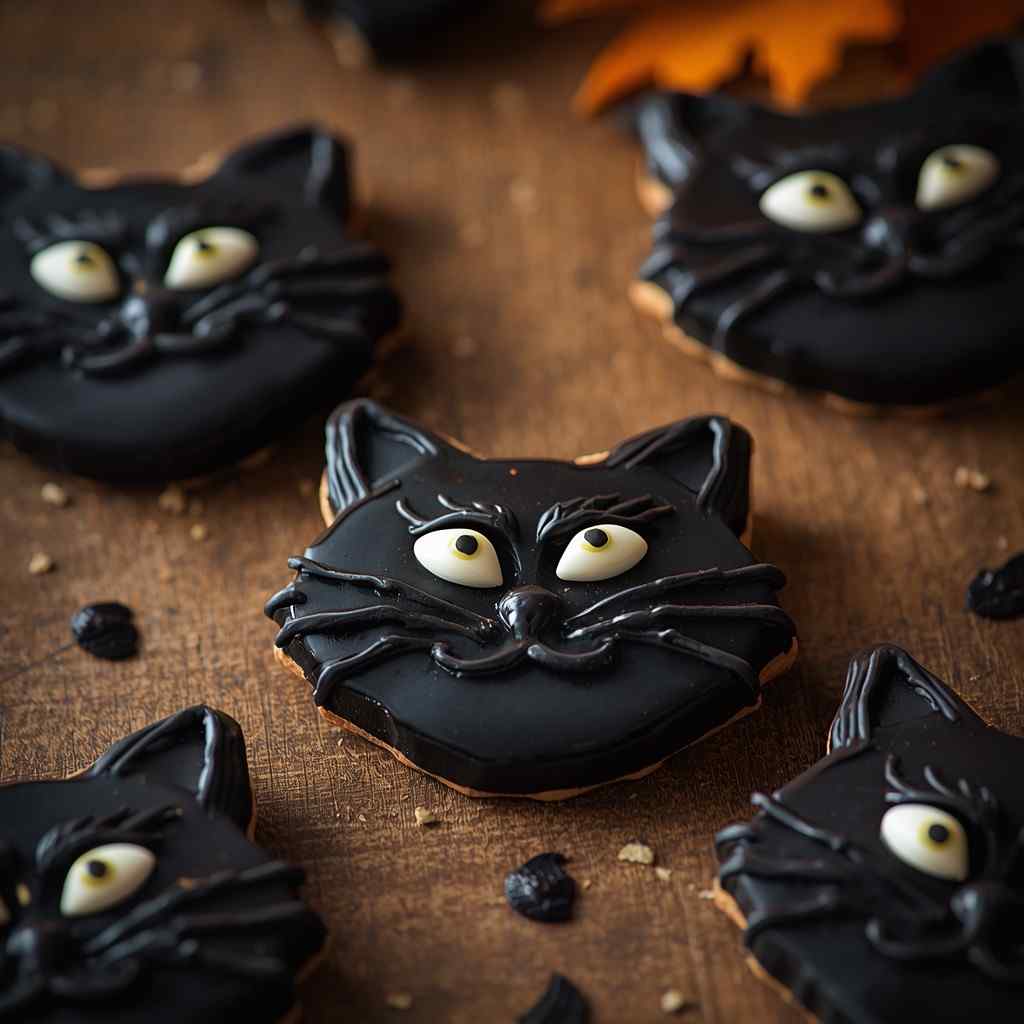
Halloween just got a whole lot more purr-fectly delicious with these Spooky Black Cat Cookies with Chocolate Coating! These adorable yet eerie cookies are shaped like mischievous black cats, cloaked in a silky dark chocolate coating, and decorated with glowing candy eyes that bring them to life. Each bite delivers the satisfying crunch of buttery sugar cookie goodness wrapped in velvety chocolate—an irresistible combination for both kids and adults.
These cookies are not only fun to make but also a showstopper at any Halloween party. Whether you’re baking for a spooky movie night, a classroom treat, or just to embrace the festive spirit, these feline-shaped delights will have everyone spellbound.
Why I Love This Recipe
I absolutely adore this recipe because it captures the whimsical side of Halloween. The combination of cute and spooky makes it ideal for all ages, and the process of cutting, coating, and decorating the cookies feels like a fun craft project. The contrast between the crisp vanilla cookie and the rich dark chocolate shell is perfection—it’s like biting into a chocolate-dipped dream!
Plus, these cookies are incredibly versatile—you can customize their expressions, colors, or even make them look like little vampire cats or witch cats. It’s one of those recipes that’s just as delightful to look at as it is to eat.
Why It’s a Must-Try Dish
This recipe is a must-try because it brings together everything that makes Halloween baking magical:
- Creative and interactive – Shape, dip, and decorate your own spooky cats!
- Deliciously balanced – Buttery cookies with a smooth chocolate finish.
- Picture-perfect – Ideal for social media, party trays, or edible gifts.
- Kid-friendly fun – Safe and simple enough for little bakers to join in.
- Customizable – Play with decorations, chocolate types, or cookie flavors.
Once you make these once, you’ll find yourself repeating them every Halloween!
Preparation and Cooking Time
- Preparation Time: 25 minutes
- Chilling Time: 30 minutes
- Cooking Time: 10–12 minutes
- Decoration Time: 20 minutes
- Total Time: ~1 hour 30 minutes
Servings and Nutrition
- Servings: About 20 cookies
- Calories per Serving: ~180 kcal
- Course: Dessert / Snack
- Cuisine: American
Ingredients
For the Cookies:
- 2 ¼ cups all-purpose flour
- ½ tsp baking powder
- ¼ tsp salt
- ¾ cup unsalted butter, softened
- ¾ cup granulated sugar
- 1 large egg
- 1 tsp vanilla extract
- Black gel food coloring (for dark cookie dough, optional if using dark coating)
For the Chocolate Coating:
- 1 ½ cups dark or semisweet chocolate chips
- 2 tsp coconut oil or butter (for shine)
For Decoration:
- Candy eyes or small white chocolate dots
- Sprinkles (optional, for whiskers or collars)
Cooking Directions
Step-by-Step Preparation Method
Step 1: Make the Cookie Dough
- In a bowl, whisk together flour, baking powder, and salt.
- In a separate large mixing bowl, cream butter and sugar together until light and fluffy (about 2 minutes).
- Add in the egg and vanilla extract, mixing until fully combined.
- Gradually add the dry ingredients to the wet mixture, stirring until a soft dough forms.
- Add black gel food coloring, kneading until evenly distributed and you get your desired spooky black hue.
Step 2: Chill the Dough
- Divide the dough into two discs, wrap them in plastic wrap, and refrigerate for at least 30 minutes.
(This helps the dough firm up and makes it easier to cut out shapes.)
Step 3: Shape and Bake
- Preheat oven to 350°F (175°C).
- Roll out the dough on a lightly floured surface to about ¼ inch thickness.
- Use a cat-shaped cookie cutter to cut out as many shapes as possible.
- Place cookies on a parchment-lined baking sheet.
- Bake for 10–12 minutes, or until edges are slightly golden.
- Let cookies cool completely on a wire rack before coating.
Step 4: Coat with Chocolate
- Melt chocolate chips and coconut oil together in a microwave-safe bowl (in 30-second bursts, stirring each time) until smooth.
- Dip each cooled cookie into the melted chocolate, using a fork to coat it fully.
- Place on a parchment-lined tray to set.
- While the chocolate is still soft, gently press candy eyes onto each cat face.
- Let the cookies set at room temperature or refrigerate for 10–15 minutes.
Step 5: Decorate the Cats
- Once the coating is firm, add final touches like:
- White icing or melted chocolate whiskers
- Sprinkles for collars
- Small candy gems for glowing eyes
Your spooky black cats are now ready to haunt the dessert table!
How to Serve
Serve these Spooky Black Cat Cookies on a Halloween dessert tray with other themed treats like ghost cupcakes, monster brownies, or candy bark.
They also make adorable edible gifts—just wrap a few in clear cellophane bags with orange ribbon!
Pair them with a mug of hot chocolate, spiced cider, or pumpkin latte for a cozy Halloween evening snack.
Recipe Tips
- Don’t skip chilling the dough – It prevents the cookies from spreading.
- Use gel coloring, not liquid, to get a deep black without softening the dough.
- Add shine to the coating – A small amount of coconut oil helps the chocolate set smoothly.
- Work in batches – Keep unbaked dough refrigerated between bakes to maintain shape.
- Use quality chocolate for a rich, glossy finish.
Variations
- Pumpkin Spice Cats – Add 1 tsp pumpkin spice to the dough for a fall flavor twist.
- White Chocolate Cats – Dip in white chocolate tinted black with food coloring.
- Glow-in-the-Dark Cats – Use neon icing or edible shimmer powder for eyes.
- Sandwich Cookies – Spread raspberry jam or Nutella between two cat cookies before coating.
- Gluten-Free Version – Substitute flour with a 1:1 gluten-free baking blend.
Freezing and Storage
- Room Temperature: Store in an airtight container for up to 5 days.
- Refrigerator: Lasts 7–8 days when kept chilled.
- Freezer:
- Uncoated cookies can be frozen for up to 2 months.
- Thaw and coat in chocolate before serving.
- Tip: Separate layers with parchment paper to prevent sticking.
Special Equipment Needed
- Cat-shaped cookie cutter
- Mixing bowls
- Electric mixer or whisk
- Rolling pin
- Baking sheets
- Parchment paper
- Cooling rack
Conclusion
These Spooky Black Cat Cookies with Chocolate Coating are the epitome of Halloween charm—mysterious, delightful, and devilishly tasty! Each bite combines the buttery crispness of a sugar cookie with the luxurious melt of rich chocolate, creating a treat that’s both elegant and eerie.
They’re not just cookies; they’re edible pieces of Halloween art that bring smiles (and a few playful chills) to everyone who sees them. Whether you’re serving them at a haunted gathering, gifting them to friends, or baking them for fun, these black cats are sure to cast a delicious spell.
Spooky Black Cat Cookies with Chocolate Coating
Halloween just got a whole lot more purr-fectly delicious with these Spooky Black Cat Cookies with Chocolate Coating! These adorable yet eerie cookies are shaped like mischievous black cats, cloaked in a silky dark chocolate coating, and decorated with glowing candy eyes that bring them to life.
Ingredients
For the Cookies:
For the Chocolate Coating:
For Decoration:
Instructions
-
Step 1: Make the Cookie Dough : In a bowl, whisk together flour, baking powder, and salt. In a separate large mixing bowl, cream butter and sugar together until light and fluffy (about 2 minutes). Add in the egg and vanilla extract, mixing until fully combined. Gradually add the dry ingredients to the wet mixture, stirring until a soft dough forms. Add black gel food coloring, kneading until evenly distributed and you get your desired spooky black hue.
-
Step 2: Chill the Dough : Divide the dough into two discs, wrap them in plastic wrap, and refrigerate for at least 30 minutes.
-
(This helps the dough firm up and makes it easier to cut out shapes.)
-
Step 3: Shape and Bake : Preheat oven to 350°F (175°C). Roll out the dough on a lightly floured surface to about ¼ inch thickness. Use a cat-shaped cookie cutter to cut out as many shapes as possible. Place cookies on a parchment-lined baking sheet. Bake for 10–12 minutes, or until edges are slightly golden. Let cookies cool completely on a wire rack before coating.
-
Step 4: Coat with Chocolate : Melt chocolate chips and coconut oil together in a microwave-safe bowl (in 30-second bursts, stirring each time) until smooth. Dip each cooled cookie into the melted chocolate, using a fork to coat it fully. Place on a parchment-lined tray to set. While the chocolate is still soft, gently press candy eyes onto each cat face. Let the cookies set at room temperature or refrigerate for 10–15 minutes.
-
Step 5: Decorate the Cats : Once the coating is firm, add final touches like: White icing or melted chocolate whiskers Sprinkles for collars Small candy gems for glowing eyes